Tuesday, June 1, 2010

Freebies 2 Deals Giveaway!

In honor of the "Freebies 2 Deals" website (www.freebies2deals.blogspot.com) I am doing a giveaway on my own blog! I love the Freebies website. It gives me a heads up on all the good deals that I can take advantage of. I will be giving away this little girls bow holder. I started making these when I found myself with so many bows that were just getting smashed in a little box. I have seen a couple of different versions of these. Some are really big Tu-Tu's that you hang on the wall and are pretty much life size. I didn't need one quite that big, so mine is a scaled down version! This is the actual one you will get if you win.

Here's how it works:

1-Leave a comment on my blog with your full name and your email address

2-Add yourself as a follower of my blog.

3-Check back on my blog on June 7th at 12:00 to see if you won.

4-If you did win you have 24 hours to contact me on my blog or the giveaway will go to someone else! Good Luck:)


Also, if you do not win and are interested in purchasing one I sell them for $17! I can do custom colors to match your little princess's room!

Tuesday, May 25, 2010

I Love Vinyl!


I had this old wood sign that I have held on to for 5 years and never used because the colors didn't match anything in my house, so...I decided to make it match! I peeled the old vinyl off and painted it black. Then I use my Cricut to cut out the vinyl. I used the "Cursive 101" cartridge and the "Plantin SchoolBook" cartridge. I was nervous about the red not showing up, but it turned out better that expected:)

Thursday, May 20, 2010

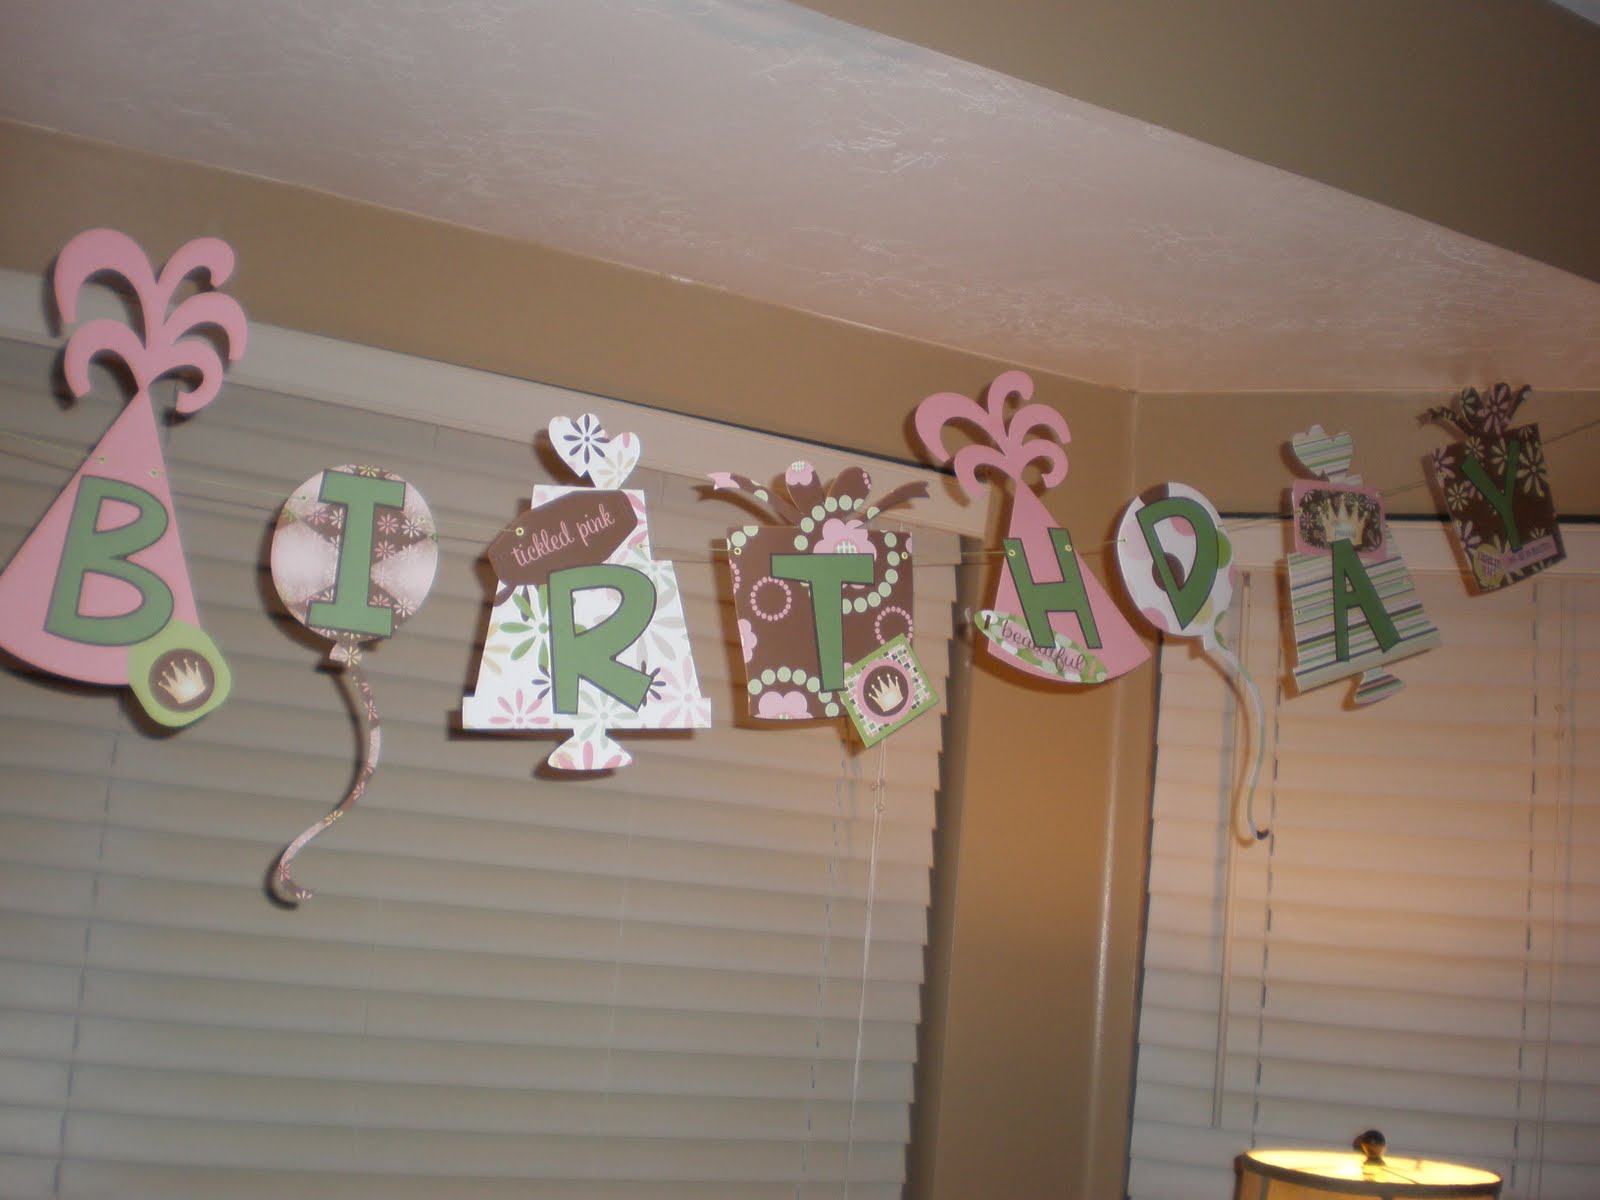
Birthday Banner


I made this banner for my daughter's 4th birthday. It turned out way cuter than I expected. I love this line of paper. I have had it in the mix of all my paper for about 3 years and finally found something that I wanted to make out of it. I used my cricut to cut out all of the shapes. I used the "Cuttin' Up" cartridge and the "Stretch Your Imagination" cartridge. After I cut out, and glued all the shapes together, I put eyelets on both sides of each shape. Make sure you put the eyelets pretty close to the top other wise they will just spin around on the string.


Tuesday, May 11, 2010

Mother's Day


I made this picture box for my mom and my mother-in-law for Mother's Day. I wanted to post it before Mother's Day in case anyone needed any ideas, but then they would have seen the finished product. It looks pretty complicated, but I saw one of these about a year ago and I was able to just make up my own way of doing it by memory. If I can do that, you could easily follow step-by-step instructions! Start with 4 12x12 pieces of card stock. Score the first one at 4" and 8" on two sides so you end up with 9 squares. Then cut out the four corners. Repeat these steps with the remaining 3 pieces of card stock only make the squares 1/4" smaller for each layer. Next glue the center of the 4 pieces of card stock together.


Then use a corner rounder on all the corners except the outside piece of card stock (the brown).


Next I put coordinating paper in the center square and on the 4 outside squares.


To make the lit, score a piece of card stock so the center square is 1/4" bigger than the dimensions of the outside piece of card stock. (My center is 4 1/4"x4 1/4") The side pieces are 1 1/2"x 4 1/4". Then cut one side, fold in the flap, and adhere with tacky tape! Decorate as desired.


This is the finished product on the inside. I decorated it with pictures of my kids, coordinating paper and stickers!

Wednesday, May 5, 2010

Bows


1) Choose your favorite ribbon!
2) Cut about 10-15" (depending on how big you want the bow)
3) layer ribbon
4) find coordinating small ribbon for center
5) cut 3-5"
6) tie around middle
7) wrap loose ends of (black) ribbon around back and hot glue
8) cover alligator clip with matching ribbon
9) hot glue bow to alligator clip!

Friday, April 30, 2010

Bow Holder!


I have posted a couple of these before, but I just recently made this one for a friend who is having a girl in July. I saw her fabric, on her blog, that she was going to do her baby's room out of and I made this to match. That is what is so fun about these. You can customize them any way you want. The process is a little tricky, but once you figure it out its really easy. First, you cut out a piece of cardboard in the shape of a shirt. Then cut out a piece of fabric in the same shape, but about an inch bigger all the way around. Hot glue the fabric to the cardboard so it is really tight. I don't glue the front, I just wrap the excess fabric around the cardboard and glue it to the back. That way you can stretch it really tight. Next, glue three long ribbons to the back. Then you are ready to put the tulle on. I have done this part 2 different ways. 1) Buy a roll of tulle from a craft store. Cut 3 strips and glue them to the back. 2) Buy a one yard from a fabric store. The advantage to doing it this way is the tulle is about 3 times as wide, so you can cut one strip and fold it in half. And continue the process by gluing it to the back of the shirt.
Choose a coordinating ribbon (I love the rick rack, but you can use any thin ribbon that matches), and glue it around the outside edge. Next, cover the the back with felt to cover all of the mess on the back. And last, just adhere a ribbon to the bottom of the shirt so it looks complete and put a coordinating button in the middle. I have loved having a cute way to display my daughter's bows!

Thursday, April 29, 2010

Flower Gum Holder

We made this project at our last Stampin' Up class. I should have taken a picture of the side of it so you could see the gum. The gum is wrapped up in the green crinkled strip of paper.
Supplies:
Old Olive CS: 8 1/2" x 1 1/2" and an extra square for the leaf (heart)
Rich Razzleberry CS: 3 1/2"x 3 1/2" cut into a flower (we used the big shot, but you could use any other cutting machine or even scissors.) The flower ends up being 3"x3"
Crushed Curry CS: 3" x 3" (the flower ends up being 2 1/2" x 2 1/2")
Both flowers were embossed with the cute Polka dots by the Big Shot, but you could just leave that step out if you don't have a Big Shot at your disposal.
Razzleberry Lemonade DSP: 5 Scallop circle cut out with the scallop punch.
1 brad: to hold the whole flower together
Ribbon: about 4-5" of crushed curry 1/2" Polka Dot Grosgrain
& 3-4" rich razzleberry 1/2" Polka Dot Grosgrain
Assembling is simple. First, run the long green strip through a crimper. Use glue dots to adhere the gum to the inside. Fold in half and staple the to ends of the green paper together. Then run a small square of green through the crimper and use a heart punch to cut out the leaf. Use a glue dot to adhere that to the inside of the stem. The center of the flower that looks like fabric was my favorite part to make. I love learning new techniques. You take each individual scallop and crumble it in your hand. After they are all crumbled, layer them and stick the brad through. Then get a small squirt bottle/spritzer and spray all the layers with water. You want them pretty wet, but don't soak them. Them just start forming them with your fingers so they curl up the way you want them to. I think the more worn and imperfect, the better! Then undo the back of the brad and stick the last to layers in (the plum and yellow) Use a large glue dot to adhere the entire flower to the stem. Last, just tie the ribbon on the bottom. So cute!!!!